
What is Facebook Domain Verification?
Check Out The Complete Guide To Registering Your Business On Apple Business Connect
Move over Google Maps, Apple has announced that it is going to supercharge it’s Apple Map listings with the roll out of Apple Business Connect to the USA
Read The "Apple Business Connect" GuideWho is Facebook Domain Verification for?
Domain Verification is the best way to handle ownership if:
- You have a larger number of Pages that are difficult to maintain manually via Open Graph markup tags
- You have adopted or have the ability to adopt Business Manager to manage your assets
- You have the ability to upload HTML files to the web root directory or the ability to edit DNS TXT records
- You can edit Link Page Posts that link to content you own—ownership will eventually serve as a means to determine who has access to link editing
- You want to control who can edit link descriptions on ads pointing to your domain.
You have 2 options available to you when verifying your domain HTML Verification or DNS options but we feel the simplest & quickest option for you is a simple cut and paste option of the HTML code.
Option 1 – Using HTML Meta Tag Upload (The Easiest Option)
Upload an HTML file to your web directory and confirm domain ownership in Business Manager
Best Option Is To Use HTML Meta Tag Upload
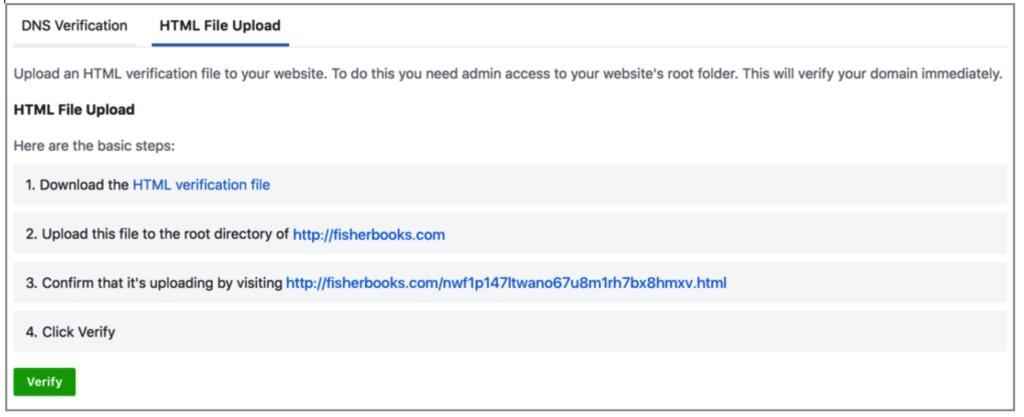
The HTML File Upload tab of your selected domain provides the HTML verification file you need to upload to your website.
- Download the HTML verification file.
- Upload the file to the root directory of your website. You will be able to see that it is uploading at the link provided in the HTML File Upload tab.
- Once it is done, click the Verify button at the bottom of the HTML File Verification tab for the selected domain.
- Leave the HTML verification file in your website’s root directory as it may be checked periodically for verification purposes.
You need admin access to your website’s root folder to perform this type of verification.
How To Add The HTML Facebook Domain Verification In Shopify
Step 1: Use a meta tag verification method
In the third-party site, you can have an option to verify your site utilising a meta tag verification method.
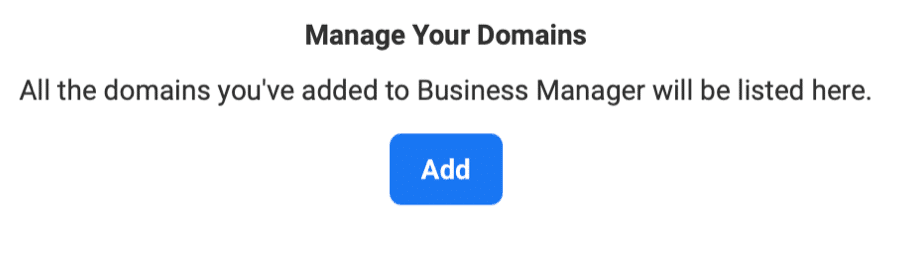
You will need to go to your Facebook Business Manager and then Business Settings > Brand Safety > Domains > Then Add
You will need to enter your domain Name and then you will be presented with 3 options
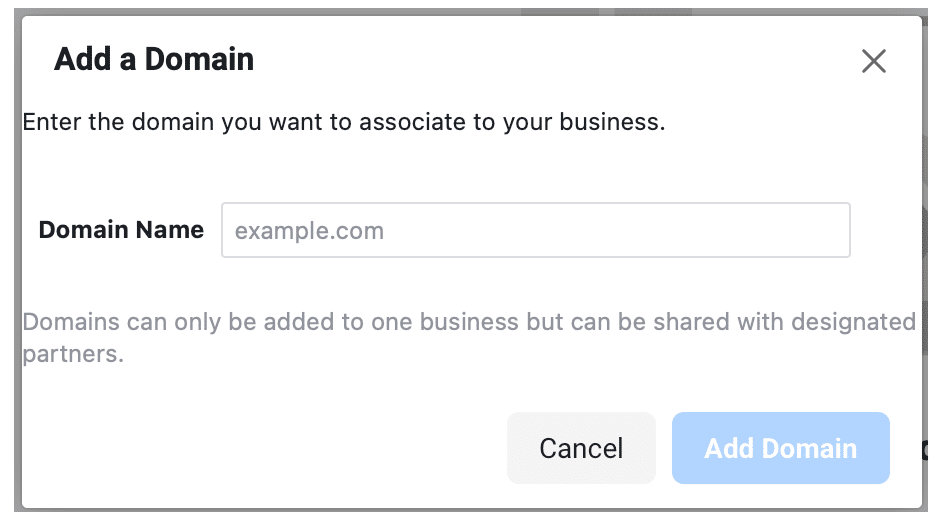
1. DNS – Add a DNS TXT record to your domain host to prove that you own the domain.
2. HTML File Upload – Upload an HTML verification file to your website.
3. Meta-tag Verification – Set the meta-tag containing the verification code into the <head> section of your website’s homepage. If choosing this we would recommend leaving this in place as Facebook may check back on your site.
Step 2: Copy full meta tag to your clipboard
Highlight the full meta tag on the third-party site and copy it to your clipboard with cmd + c on a Mac or ctrl + c on a PC. You must choose everything, even the < and >. You can take a look at the example:
<meta name=”facebook-domain-verification” content=“xxxxxxxxxxxxxxxxxxxxxxxxxxxxxxxxxxx” />
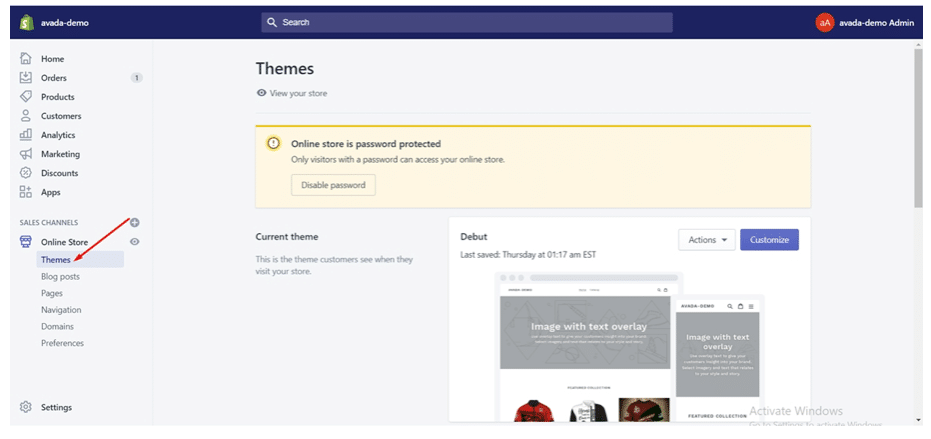
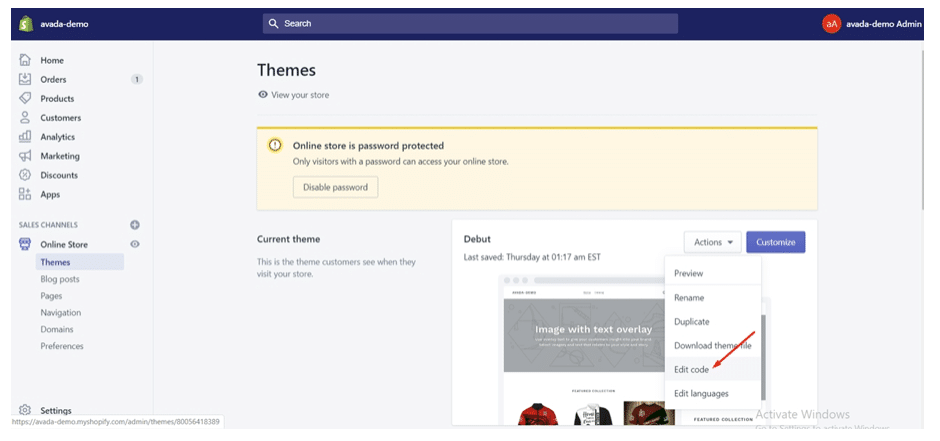
Step 3: Go to Themes
In your Shopify admin, proceed to the Online Store section, then click Themes.
Step 4: Click Edit code
Identify the theme you intend to adjust, tap on Actions, and then Edit code.
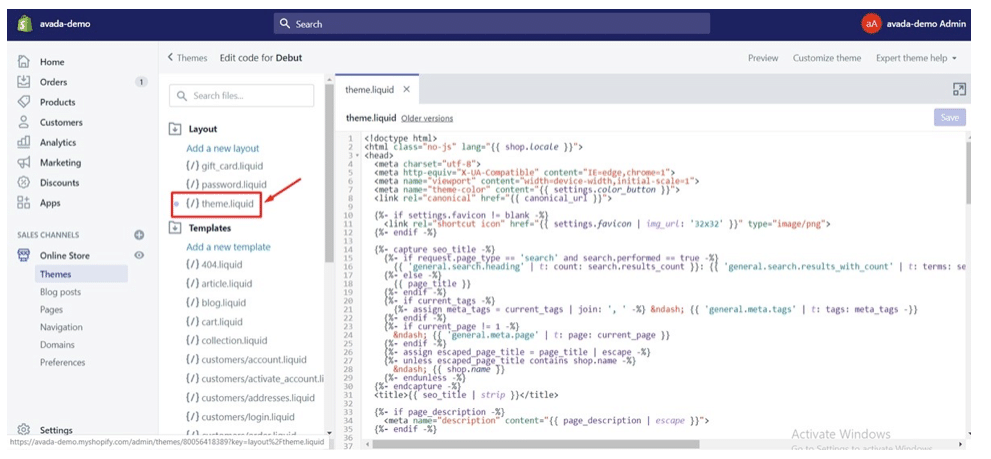
Step 5: Click theme.liquid
The <header> is in your theme.liquid file. From the Layout section, tap on theme.liquid to open the file in the online code editor.
Step 6: Paste the meta tag that you copied
Paste the meta tag that you copied on a blank line right under the opening <head> tag or before the first <body> tag.
Step 7: Tap on Save
Option 2 – DNS Verification with Facebook ( If you bought your domain in Shopify)
If you’re looking to add a record to your DNS settings for verifying your domain with ‘Facebook’ with your Shopify Domain, your going to need to go the domains page in your admin, there’s a button to manage your Shopify-purchased domain.
Below are some steps here to help with navigating and locating the DNS settings button:
- First you’ll want to navigate to your domains page, that’s located under ‘Online store > Domains’.
- Then click manage on your Shopify-purchased domain.
- On the next page, look for a DNS settings button near the top of the page.
- From there, you can add Facebook’s DNS records for verifying your domain.
Additional Notes On DNS TXT Record
Here is a link to Facebook’s domain verification in Business Manager guide, you can verify your domain using HTML upload or DNS TXT record. With the TXT record, you can simply put ‘Facebook’ for the name of the TXT record.
The name ‘Facebook’ on the new record is to help differentiate between other records that you might have in your DNS and, even if it’s left blank, it doesn’t impact the domain verification.
Once you’ve added Facebook’s TXT record, you’ll need to hop back on Facebook’s Business Manager to complete domain verification.