How to set up Facebook Conversions API (CAPI) in Shopify & WordPress
How to set up Facebook Conversions API (CAPI) in Shopify & WordPress
If you’re a business advertising on Facebook and Instagram, you will understand sheer importance of tracking proper data from your paid social activities.
Accurate tracking allows you and your team to understand the performance of your ad campaigns, how best to optimise, and how to scale your business further based on accurate data and insights.
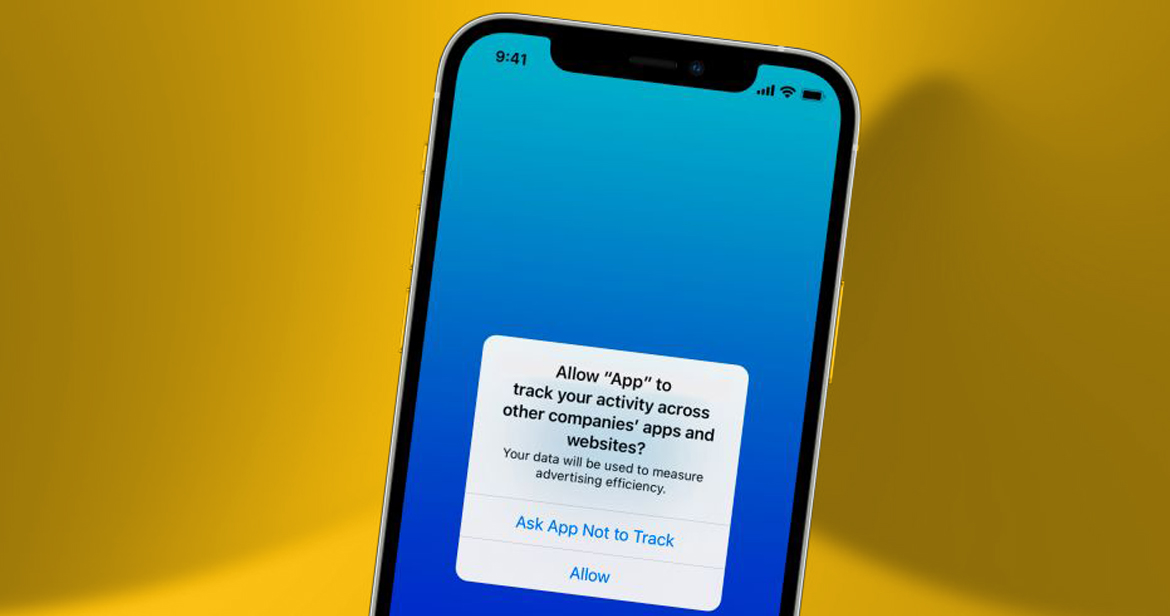
However, Apple iOS 14.0 update and EU’s GDPR and California’s Privacy Rights Act it means privacy regulations are making it much harder to keep track of your customer’s and prospects actions on your website.
With the above Privacy regulations and the impending Google planning to kill off 3rd party cookies, it is now time for marketers and online store owners to adapt or watch your sales and marketing funnels start to crumble.
As if as business owners we have not had enough thrown at us over the last 12 months, but there is a solution and it means implementing Facebook conversions API or CAPI.
If your an in-house marketeer at a brand, a small agency or we have created this article to explain “How To Set Up Facebook conversions API CAPI” on your eCommerce platform/store so you can generate the most accurate data possible.
If your looking for the the answer to will Facebook Conversion API (CAPI) work if someone opts out of tracking, then I am sorry to report that CAPI is not the holy grail of a solution to this! these new changes simply mean that things will be a little grey until Facebook find a better way.
What is Facebook Conversions API (CAPI) and Why You Really Need it?
You’re probably familiar with Facebook Pixel and other tools that help you track web and offline events (I.e. customer behaviour and & actions) from Facebook servers to yours.
Facebook CAPI plays a major role in this data tracking. Thanks to the CAPI, you can:
Track and measure a wide range of your customer data
Track events accurately (no data lost due to ad-blocking tools, server or page crashes, etc.)
Control when to share and what to share
With new privacy regulations rolling out to browsers worldwide, performance tracking of your ads becomes increasingly difficult.
For that reason, you should connect the server of your store directly to Facebook. This will keep your data intact and avoid any inconvenience, misinformation, or lack of information during the tracking.
Let’s find out how to set this up manually.
How to Set Up Facebook Conversions API (CAPI) on your Shopify Store
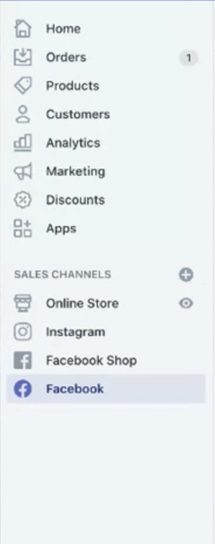
To set up Facebook CAPI on Shopify, you first got to have administrator access to your business’s:
2. Click “Facebook” under “Sales Channels” on the left sidebar
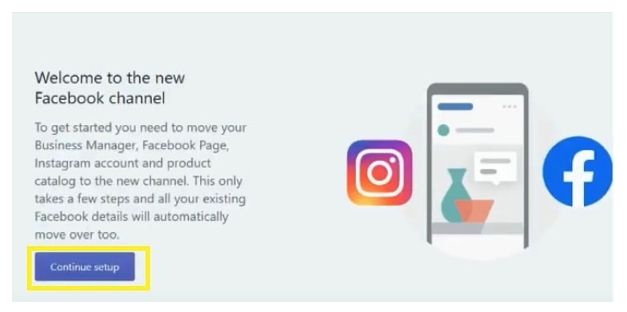
3. Select “Continue Setup.”
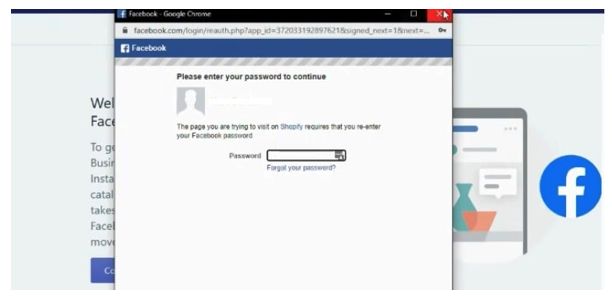
4. Log in to your Facebook account from Shopify (if you already haven’t). This will link your Business Manager, Facebook page, and Instagram account.
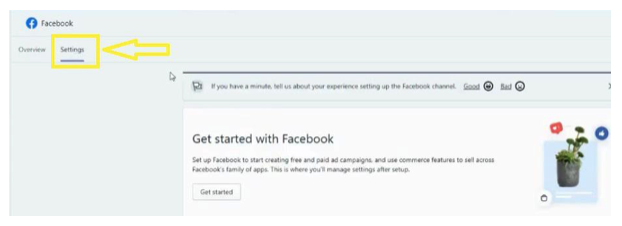
5. Go back to the “Facebook” tab to the left.
6. Click the “Settings” tab on the top left.
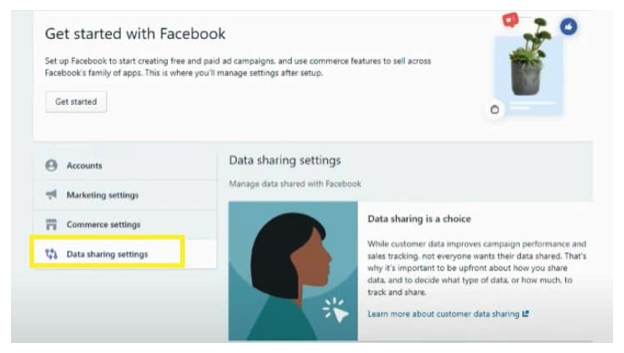
7. Click “Data sharing settings.”
8. Make sure that “Customer tracking” is enabled.
9. Then, make sure that the “Maximum” tracking is selected below
And voila! You’re all prepared to track your Shopify data directly on Facebook.
How to Set Up Facebook Conversions API on Other Platforms
If you’re using another platform to power your ecom store (WordPress, WooCommerce, MakeShop, etc.), you can still implement conversions API.
This time, head to your Facebook business manager. Then, follow these simple steps:
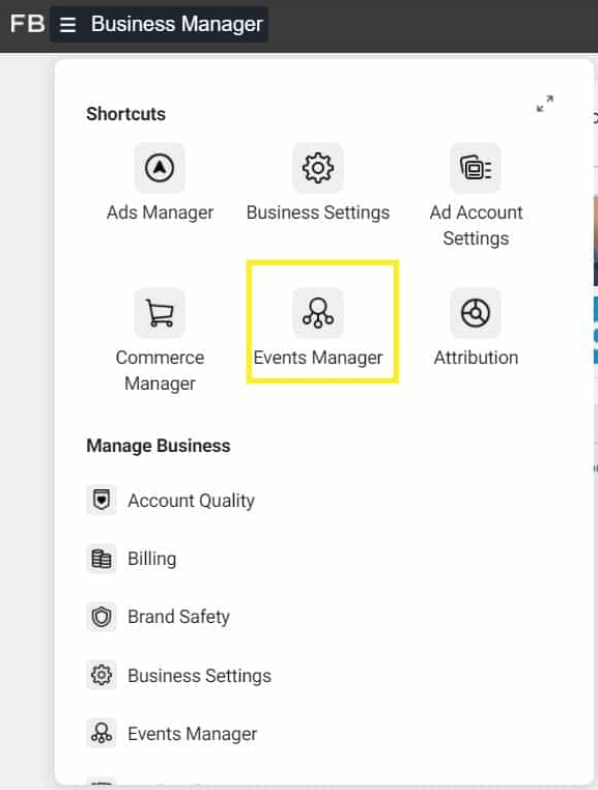
1. Click the three horizontal lines to the top-left of the screen to display the dropdown menu.
2. Select “Events Manager.
3. Choose the desired business from the top-right.
4. Select the appropriate pixel under the “Data Sources” section.
5. Select the “Settings” tab.
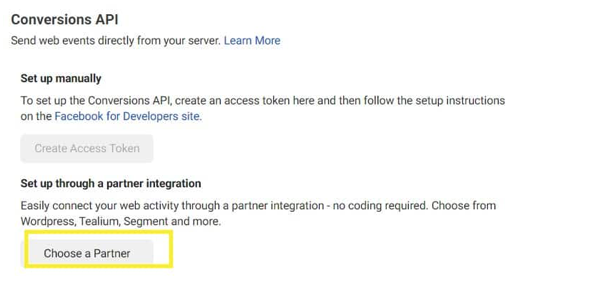
6. Scroll down to the “Conversions API” section.
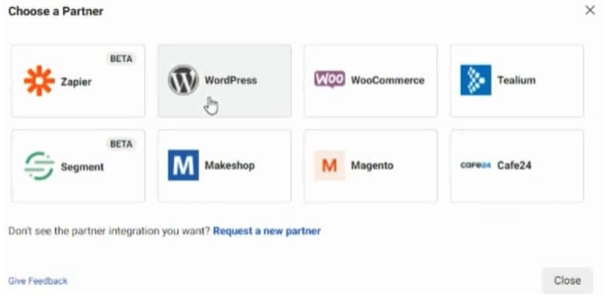
7. Click “Choose a Partner” under the “Set up through a partner integration.”
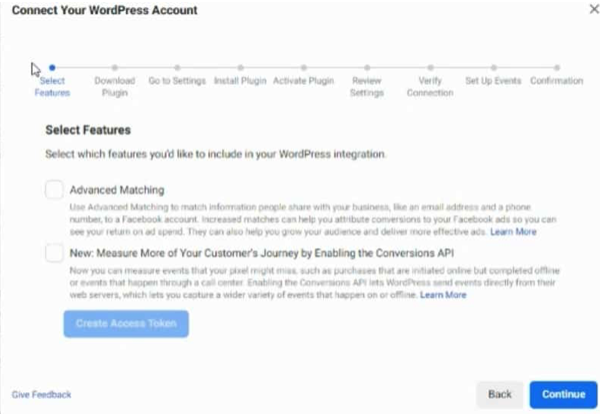
8. Select your eCom store’s platform from the list.
9. Follow the on-screen instructions to set up CAPI on your new platform.
And that’s it. Now you can track all conversions on the platform directly from your Facebook account.
Bonus Tip: If you’re using WordPress, you can also install Pixel Your Site plugin and set up the entire thing manually.
What If I’m Using a Platform That’s Not on Facebook’s Partner List?
Currently, only Shopify provides a quick and easy method to implement CAPI out of non-listed platforms.
Store builders like Big Commerce still don’t provide easy solutions as of yet. Most of the time you can contact your web developer and add the CAPI code directly to the website.
However, these recent happenings may propel certain platforms to simplify the process.
All we can do is wait.
Does Facebook Conversion API (CAPI) Work If Someone Opts Out Of Tracking?
The answer is “sort of”… Not what you wanted to hear I know – but we wold rather report an honest and true answer here as we are seeing the Internet awash with rumours that CAPI is the “ULTIMATE FIX”.
Due to the nature of data being rerouted from the pixel to the CAPI then to the business manager, there will most likely be a delay in reporting.
To make things even trickier, Facebook will also be required to randomise the data collected if someone opts–out of tracking (this is where your probably seeing mis-reporting).
You need to ensure you have verified your domain and set you event priotisation with the 8 conversion events each account now has available (formerly 28). These can be updated as time goes on, but only 8 standard and custom events can be utilized at a time.
This goes for both Facebook Conversion API (CAPI) and browser-based pixel events. When a user is on Android or has opted-in to tracking, all 8 events will be passed from that user.
When the user has opted-out, we’ve been told that 1 prioritized event will still be attributed to that user within the 1-day attribution window.
For example, if an advertiser prioritized their events as: Purchase > Initiate Checkout > Add to Cart >View Content (with purchase being most important) and a user who opted out makes a purchase, the advertiser will only see the purchase event attributed.
If the user does not make a purchase, but added product to their cart, the advertiser will see the “Add To Cart” event, as it is the next most important event they have prioritised for that the opted-out user has taken within 24-48hrs of that action.
A seasoned luxury goods & services digital marketer with over 20 years Exp. A specialist in developing "disruptive" digital campaigns and strategies for FMCG brands both within the UK and International.
• Paid Social (inc. Facebook/Instagram, TikTok, LinkedIn & Pinterest)
• SEO (Search Engine Optimisation)
• PPC (Pay Per Click)
• CRO (Conversion Rate Optimisation)
• ASO (App Store Optimisation)
• Direct To Consumer & B2B Digital Strategy Specialist
• Social Media Marketer